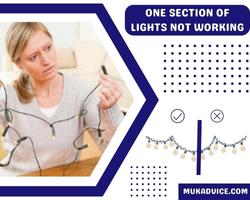
There’s nothing more frustrating than having your beautiful string of lights, whether for a festive occasion or everyday décor, suddenly stop working. If you’ve noticed that one section of your lights isn’t lighting up, you’re not alone.
This common issue can leave you scratching your head, but don’t worry – we’ve got your back!
In this guide, we’ll walk you through the most likely reasons why a section of your lights might not be working and provide simple, practical solutions you can try right now.
From a loose bulb to faulty wiring, there are several potential culprits that could be causing the problem. And the best part? Most of these solutions are easy to implement and don’t require professional help.
Whether you’re decorating for the holidays, setting up outdoor lighting, or just enjoying the calming glow of your lights at home, we know how important it is to have everything working perfectly.
So, if you’re ready to get your lights shining bright again, read on for expert troubleshooting tips and tricks that will help you fix the issue quickly and safely.
One section of lights not working
Let’s get your lights back on track!
Why Is One Section of Lights Not Working?
Before jumping into the solution, it’s important to understand what might be causing the issue. The most common reason for one section of lights not working is a problem with the connection or the circuit. Let’s take a closer look at the possible culprits:
1. Loose or Broken Bulb
One of the most common reasons for a section of lights not lighting up is a loose or broken bulb. If a bulb in the middle of a strand of lights is not securely connected, it could cause that entire section to fail. Similarly, if a bulb is burned out, it may create a gap in the circuit, causing the section of lights to stop working.
2. Faulty Wiring or Connector
Another potential issue could be faulty wiring. A broken wire or damaged connector could interrupt the flow of electricity to the lights, causing a section to not work. This is especially common in outdoor lights that might be exposed to the elements, resulting in wear and tear over time.
3. Blown Fuse
Most string lights are equipped with a fuse, and if that fuse blows, it can stop the lights from working. If one section of your lights is not lighting up, it’s worth checking the fuse to see if it needs replacing.
4. Power Source Issues
If you’re using a power strip, timer, or extension cord, there could be an issue with the power source. A faulty outlet or a power surge could cause certain sections of lights to stop working while the rest of the lights remain unaffected.
5. Electrical Overload
Sometimes, if you’ve connected multiple strands of lights together or used lights that draw too much power, the circuit can overload, causing part of the strand to fail.
6. Bad Controller (For Smart Lights)
For smart or LED lights, a faulty controller could be responsible for the malfunctioning section. If you’re using a remote or app-controlled lights, it’s possible that the signal isn’t reaching the entire strand.
7. Damaged Power Cord
The power cord, whether it’s part of a string of lights or an extension cord, can become damaged from wear and tear, water exposure, or even animal interference. A damaged power cord could stop the flow of electricity, leading to parts of your lights going dark.
How to Fix One Section of Lights Not Working: Step-by-Step Guide
Step 1: Inspect the Lights
Start by inspecting the section of lights that isn’t working. Look for any obvious signs of damage, such as:
- Broken or cracked bulbs.
- Wires that are frayed, bent, or disconnected.
- A power plug that seems loose or disconnected from the power source.
If you notice any damaged bulbs, replace them with new ones. For string lights, ensure the bulbs are twisted in tightly to avoid any loose connections.
Step 2: Check the Fuse
Most light strings, especially Christmas lights, are equipped with small fuses within the plug. A blown fuse can prevent the entire string of lights from working. To check the fuse:
- Unplug the lights from the power source.
- Open the fuse compartment on the plug (usually found by sliding a small door or cover).
- If the fuse looks blackened or has a broken wire inside, it’s blown and needs replacing.
- You can replace the fuse with one of the same rating (typically listed on the fuse itself) and test the lights again.
Step 3: Test the Power Source
If you’ve checked the fuse and the bulbs but still have no luck, it could be an issue with the power source. Try plugging the lights into a different outlet or test the original outlet with another device to make sure it’s functioning properly.
If you’re using an extension cord or power strip, inspect it for any signs of damage or malfunction. Sometimes, simply swapping out the power source can solve the problem.
Step 4: Inspect the Wiring
If the issue persists, it could be a broken wire within the strand. Inspect the entire length of the string, looking for any visible signs of damage. If the wire is cut or frayed, you may be able to repair it using electrical tape or by splicing the wire, but if the damage is severe, replacing the strand might be your best bet.
Step 5: Replace a Faulty Controller or Remote (For Smart Lights)
For smart or LED lights that don’t have a visible break in the wiring, the controller might be malfunctioning. If you’re using a remote control, try replacing the batteries or resetting the controller.
If your smart lights are controlled by an app, check the settings to make sure everything is configured correctly.
Step 6: Test the Entire Strand
Sometimes, testing the entire strand of lights can reveal whether the issue is with the section or the entire strand. If you’re troubleshooting a single section, disconnect that portion and test the lights.
You can also try connecting the faulty section to a different strand of working lights to see if the issue is with the lights themselves or the section.
Step 7: Consider the Age of Your Lights
If your lights are several years old, they may simply have reached the end of their lifespan. Old lights are more prone to failure due to damaged wiring, corroded connections, and worn-out fuses. In this case, it might be more efficient to replace the string of lights rather than attempting to repair it.
Preventative Tips to Keep Your Lights Working Perfectly
Once you’ve resolved the issue, it’s important to take steps to prevent future problems. Here are some tips to keep your lights working smoothly for years to come:
- Store Lights Properly: When you’re not using your lights, especially holiday lights, store them in a dry, cool place. Avoid wrapping them too tightly or tangling them, as this can cause wear and tear on the wiring.
- Use the Correct Voltage: Always use lights that are compatible with your power source. Overloading your electrical circuit can lead to overheating and blown fuses.
- Weatherproof Your Lights: If you’re using lights outdoors, make sure they are rated for outdoor use. Exposure to rain, snow, or extreme temperatures can cause damage.
- Regularly Inspect Your Lights: Before you put up your lights, check each strand for any signs of damage or wear. Testing them early can prevent you from discovering issues when you’ve already strung them up.
Conclusion
Dealing with one section of lights not working can be frustrating, but as we’ve seen, there are several simple solutions that can help restore your lights to their full glory. Whether it’s as easy as tightening a loose bulb, replacing a blown fuse, or fixing a faulty power connection, troubleshooting your lights is a manageable task that doesn’t require a professional’s touch.
Remember, the key is to stay patient and methodical in your approach. Start with the basics—checking bulbs, fuses, and connections—and gradually move on to more complex solutions like inspecting the wiring or testing the power source.
By following these steps, you’ll save both time and money, and most importantly, you’ll get your lights shining brightly once again.
Once your lights are working perfectly, make sure to store them properly and inspect them regularly to avoid future issues. With these tips in mind, you can keep your lights in top condition, no matter the occasion.
Now, you’re equipped with the knowledge to tackle any lighting problem that comes your way. So, go ahead and enjoy the warm, glowing ambiance of your perfectly functioning lights!


